Do I buy my props especially for my flatlays?
Well...not exactly, but it definitely does have a slight influence.
In the last edition of How To Master The Flatlay, we covered the general basis of what we need to know about photography to get the most out of our skills, such as getting to know our camera, how we should be saving our images, and the best practices in how to edit them. We also briefly covered styling our flatlays, but it's time to delve in very deep into my favourite topic.
Props are what makes a flatlay. It doesn't matter if you're using two props, or twenty props, everything you put down is there to enhance your photograph, and should not be there to fill in the gaps. But what props should you be using?
You can literally use absolutely anything as a prop in a flatlay, but today I'm going to be sharing props that I use and would be easy to find and beneficial for bloggers. Please don't go spending lots of money on new props. The only thing I would suggest investing in is a good set of backgrounds, and even those won't give your bank balance a heart attack. The questions I ask myself when buying props is can I use them in more than one flatlay, and I can use them other than in my flatlays? For example, I love using fresh flowers in my imagery, but I know for sure they're going to be spending more time in a vase than on the ground, and does that body cream feel as nice as it looks?
BACKGROUNDS
The biggest and most important prop of all is your background. Whether it's white, wooden, pink, or marble, you can achieve your background in many different ways. I have a plain white thin board made from wood which is the basis of all of my flatlays. If you're using anything white, make sure it's white-white, not off-white or any other white shade as it will impact the colour of your background when editing. A question I get asked a lot is where I get my backgrounds from. It's very inexpensive and so easy to store - I just use wrapping paper.
It's usually a couple of pounds and you just roll it out onto a hard surface when you need it, and roll it back up when you're done. My favourite places to buy my rolls are from Typo, Ikea, and Asda. Ideally, they shouldn't be glossy or have shiny elements as that will create bad reflections when taking your photo. Sometimes you can have papers that make a white scuff mark when folded, so stay far away from those. (Unless you're an editing genius). Large sheets of coloured cardboard are great too, as long as you have somewhere to store them. I know that wallpaper samples are a popular choice too, but I can never find anything that I like. Another alternative is to take a photo of what you'd like your background to be and get it printed onto very thick card. Don't be afraid to get creative too. I attached shiny twine to my background and used a fast aperture to create a shiny light detail at the back of a product shot. This may not be a flatlay, but it does show how simple you can make things.

BEAUTY PRODUCTS
I'm sure us bloggers will not have a problem with this. I will also keep any empty product containers to reuse in my imagery. What I try and do is use products, such as naked products, bath bombs, or ones in seethrough containers, in a few too many flatlays before I actually use them for its true purpose. You don't just have to stick to actual beauty products, accessories such as brushes, make-up or skincare applicators work great in photographs too.
ARTS AND CRAFTS MATERIALS
My arts and craft collection is huge, but I used to forget to use them as props. Paint palettes or a cross stitch project I'm working on brings in that personal value, but props like buttons or pom-pom trim still work just as well. If you love to sew, add fabric, or a design book/sketchbook you may have. We don't all have the same interest, so think about how you can use yours as props.
FLOWERS
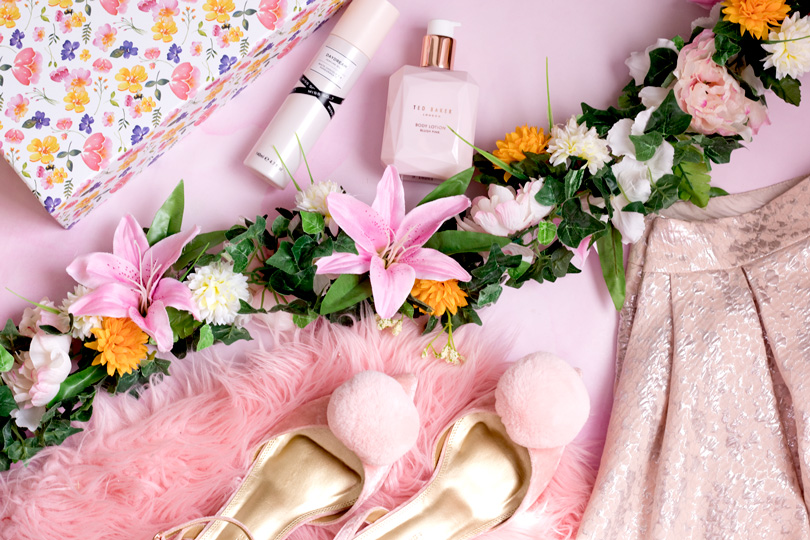
Flowers will always bring a little life into your flatlays, but they don't always have to be real. I have a selection of artificial flowers which I like to place around as final details, and I'm certain you can tell they don't look real, but in most cases, it doesn't really matter. I've made my own flower garland to have a beautiful selection of flowers no matter the season. If you're using a bouquet, think about the way you're presenting them. Would using a ribbon to hold them together look more effective, or maybe a few single flowers placed about.

BOOKS
And I'm not just talking about reading books. If you're into journaling or scrapbooking, please add those in too. It's the props that are unique to you that really gives a flatlay personality. Journals with beautiful covers make great layering pieces.
QUOTES AND ARTWORK
I love a good quote, and they really help create a mood or emotion in your flatlay. I use postcards from Paperchase, or open the pages to my journals and diaries which have printed quotes. If you're artistic, showcase your drawings.
It's nice to finally give my stationary purpose. It may not be its intended cause, but it's close enough. Some of my favourites are printed washi tapes, cute sticky notes, pastel pens, and printed note paper.
CLOTHING
Styling clothes on the ground is a pain, but simply fold it down and use it as another texture in your flatlay. I have a few smock dresses that have an excessive amount of fabric and will use it as what seems like just fabric. Use shoes, bags, and other accessories too. Pay close attention to the details - how the laces or buckles look, does your bag look too flat, or how to place them in a way like they've just been used.
TABLEWARE
Cups, plates, bowls, anything you'll find in your kitchen cupboard. Though I have got to admit, I have bought a selection of plates just for my photography. In my defence, I use them mainly for my food photography, and what I already have at home just wasn't cute enough. Don't be afraid to fill your crockery with food and drinks. Add straws or fresh fruit into your water, or take a bite out of your cake. Even though these flatlays are planned, make them feel realistic.
PACKAGING
I love keeping the packaging to use as little details. Swing tags, or pretty boxes. I have even kept a delivery box I received from Beauty Bay, as it has an adorable red and white heart print, which I love using as an addition to my background.

CONFETTI
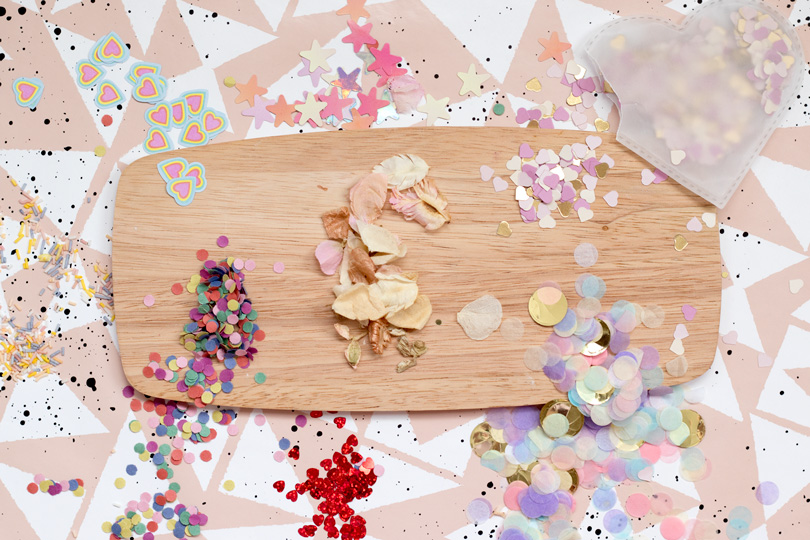
Using confetti is what makes my flatlays mine. (And also an absolute pain to clean up). I've collected different shapes and colours, and have even added edible sprinkles and dried flowers to my collection. Once I'm happy with the styling of my flatlay, I usually just sprinkle them over and hope of the best. Though that does result in me realising there is too much and trying to pick them up without moving anything. I'll never learn. These are so inexpensive, and you could easily make your own with craft hole punches and paper. These definitely aren't for everyone's style, but maybe there is something you can use that will give the finishing touches to your flatlays.
AND HERE ARE A FEW MORE IDEAS
- Trinket tray
- Vinyl
- Ribbons
- Stickers
- Candles
- Camera/polaroid camera/photographs
- Laptop/tablet/phone
- Magazines
- Gift boxes/storage boxes
- Birthday cards/postcards
- Letterboards
- Fairy lights
- Home decor - cushions, blankets, rug etc.
- Yourself (though you may need to ask someone to take the photo)
Oh and remember, keep your props well organised!!
I have been finding it so hard throughout this post, not to include tips from the next edition - how to style your flatlay. This is my absolute favourite and I think it's what you guys are dying to know the most. How to theme your props and style them together. I may even be purchasing a tripod (finally!) for this occasion. Let me know in the comments below what are your favourite props to use in your photography.

saaas
ererererr
tessinggg